Wednesday 30 May 2012

Sorrel, Bacon & Red Onion Tart


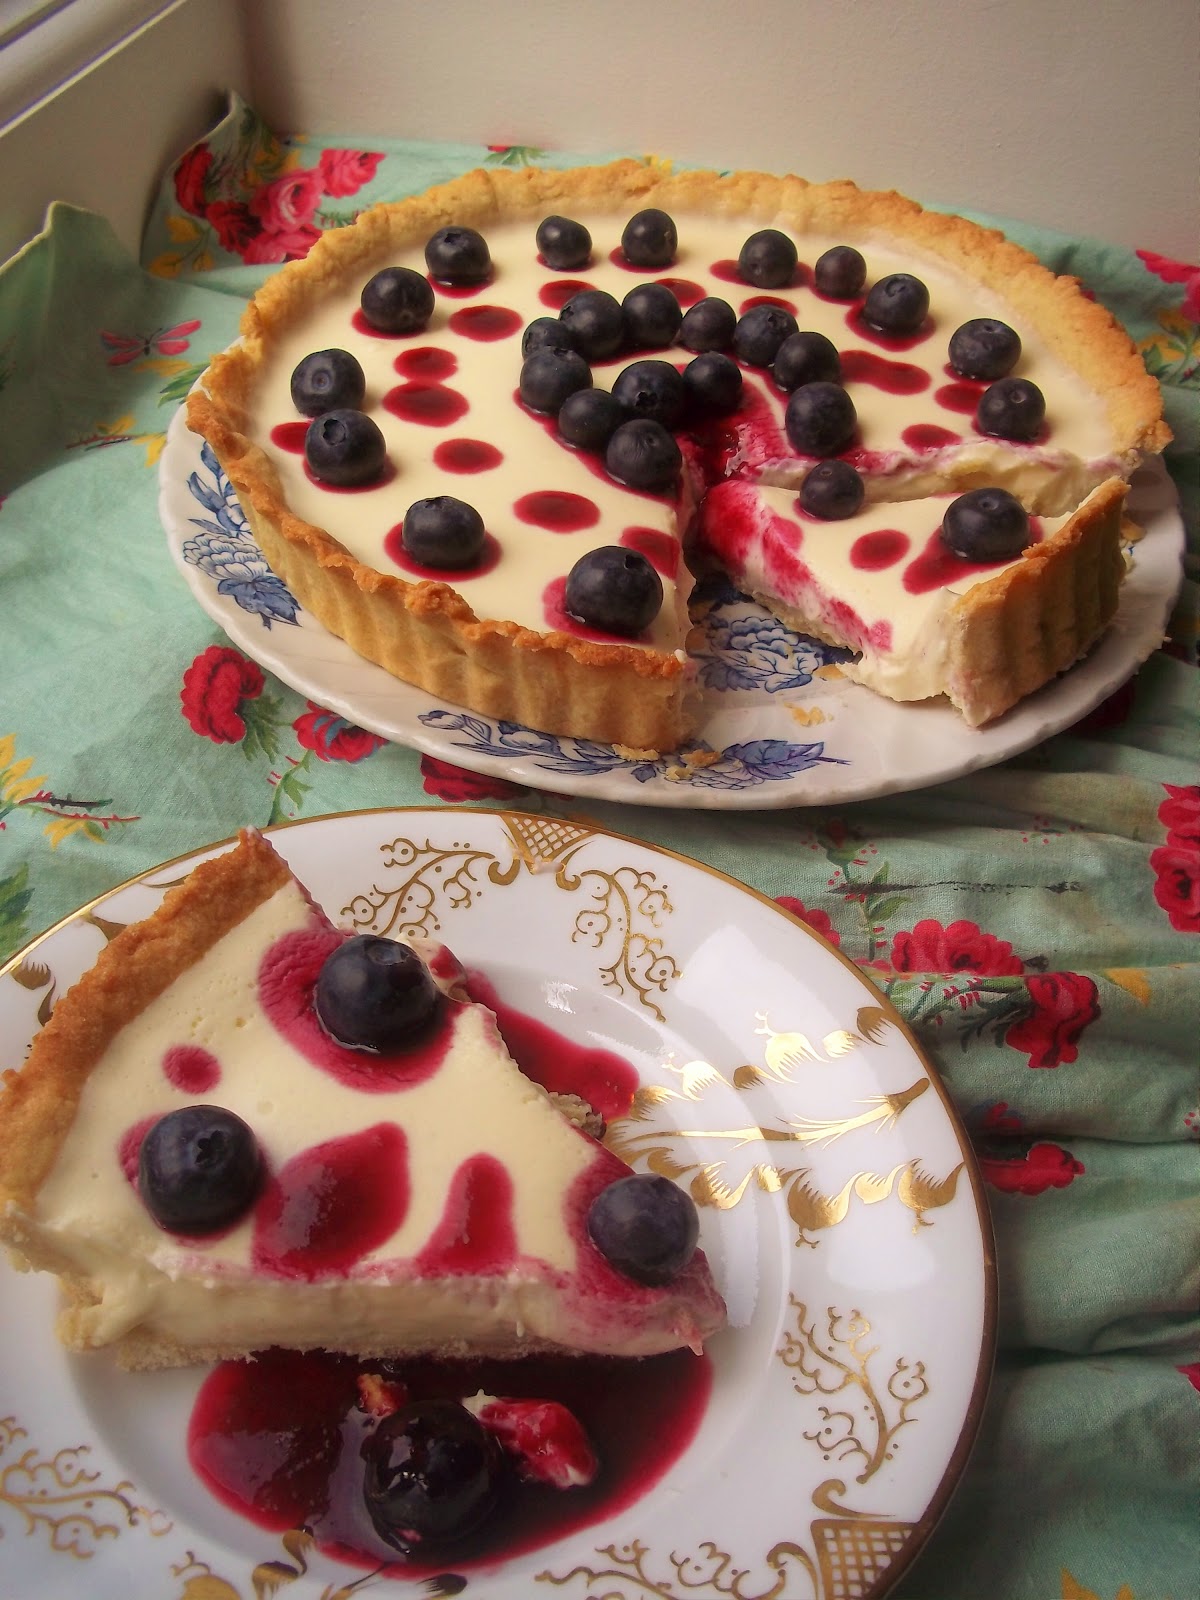
Our sorrel plant in the herb garden has suddenly gone mad, and faced with an explosion of the stuff I've been looking around for ways to use it. Sorrel is a tangy, lemony herb which works well with similarly strong flavours such as salmon, omelettes or goats cheese. It also tastes delicious as an accompaniment to bacon, as demonstrated in this great creamy savoury tart. Sorrel is known for its purgative and detoxifying properties, so it's just as healthy as it is tasty. The reason I photographed only two slices of the tart was that it was so good we'd already eaten the rest...


Recipe
Adapted from the one for Sorrel Tart by Tamasin Day-Lewis in her fab book The Art of The Tart. Buy the book on Amazon here 

Serves 8

1 egg, beaten, for pastry
225g ready made shortcrust pastry
6 rashers streaky bacon
200g sorrel, leaves only, washed and stemmed
200g red onions, finely sliced
50g unsalted butter
250ml double cream
2 eggs, plus 1 and a half egg yolks
salt and pepper


1. Turn the oven to 190C (170C fans).  Line a 20cm tart tin with the ready made rolled pastry. Cover the base and sides of the pastry case with baking paper, and then fill the base with ceramic baking beans (or dried beans if easier). Bake blind in the oven for about 15 minutes until the pastry is set.

2. Remove the baking beans and paper, prick all over the base with a fork and bake for another 5 minutes until the pastry is sandy to touch. Then take out of the oven and leave to cool in the tin on a wire rack, before brushing with beaten egg.

3. Cut the bacon rashers into quarters. Heat a little oil in a frying pan before adding the bacon pieces. Fry gently until the bacon is cooked but not crispy. Then take off the heat and place the bacon on kitchen roll to get rid of any excess oil. Scatter the bacon pieces over the base of the pastry case.


4. Boil the sorrel in salted water for a few minutes until the sorrel has turned a grey colour, then remove from the water and sieve.


5. At the same time, in a large pan gently saute the chopped red onions over a low heat with 25g of the butter, stirring now and then and covering with a lid. It will take about 25-30 minutes for the onions to be translucent.


6. Heat the sorrel in another pan with the rest of the butter, again over a low heat for about 20 minutes until the greens are wilted. Be careful not to overheat or burn the sorrel or the onions.


7. When both sorrel and onions are ready, mix them together in a large bowl and leave to cool.


8. Meanwhile, season the double cream and beat in the eggs and egg yolks. Add this to the sorrel and onion mixture and stir gently until combined.


9. Pour the filling over the bacon pieces into the pastry case. Bear in mind that you may have a bit of mixture left over depending on the size of your tart tin. Bake in the oven for about 35-45 minutes until a pale golden colour.


10. When baked, leave the tart to cool in it's tin for 10 minutes before taking it out and serving it with green and tomato salads.


This tart was idly baked to the sounds of Grinderman's album Grinderman 2

Sunday 27 May 2012

Strawberry & Mint Mini Tartlets


When the sun shines as brightly as it has done this weekend, I'm disinclined to spend my time baking in a hot kitchen. These pretty tartlets take very little time, and taste like lovely mouthfuls of sunshine, an easy way to use up any pastry offcuts.


Recipe
Serves 2

offcuts of leftover sweet pastry, ready made or from the pastry recipe of white chocolate, blueberry & lemon tart here
2 strawberries
1 tablespoon strawberry jam
2 sprigs of mint


1. Turn the oven to 190C (170 fan ovens). Roll and cut the pastry into heart shapes or mini circles.


2. Bake the tartlets in the oven for 15-18 minutes, until the pastry is sandy to touch. When baked, take out of the oven and leave to cool on a wire rack.


3. To make the glaze, heat the strawberry jam in a small pan, stirring until smooth and melted. Bring the jam to the boil, then take off the heat. Strain the jam through a sieve and keep the strained juice.


4. Wash and top the strawberries, then dry with kitchen towel. Place a strawberry, pointed ends up, on the pastry tartlets.


5. Brush the glaze over the strawberries and tarts.


6. Serve and eat within 2 hours of serving.


These tartlets were idly baked while listening to Laura Marling's album A Creature I Don't Know


Friday 25 May 2012

Awards! Plus Gluten Free Thyme & Lemon Madeleines

Something I've noticed since I started blogging a year ago is that I seem to think differently to many of the food bloggers online, for instead of striving for perfection in my baking I have an aversion to the very idea. For one thing, I prefer a rustic style of baking and presentation; for another, it's the only way I know how to bake. I'm a messy girl, and I accept that about myself. Perfection isn't human, so why should we expect it from our human made food?


Nevertheless, I'm delighted to learn that a fellow blogger Bee of The Baking Bee has nominated me for some blog awards. Thanks Bee! It's a great compliment as Bee writes a lovely blog of her own which you should check out at http://the-baking-bee.blogspot.co.uk


Rules for accepting these awards are:


1. Thank the person who nominated you for this award and link back to them.

2. Share 5 random facts about yourself

3. Spread the joy by nominating other bloggers

4. Convey to the blogger about the nomination.


So here are 5 random facts about me:


1. I write under a pseudonym, to separate my busy work and idle baking lives. Emalina Eve isn't my real name, and no I'm not going to tell you what is!


2. Despite baking and eating a cake a week, I'm one of those really annoying slim people who can't put on weight. Yoga helps, but it's basically my rule that I only eat my own cakes, never shop bought ones, and very little chocolate or bread, that keeps me in check.


3. At the age of 24 I worked as an artist's model. I was writing a novel which I never finished, nor  properly started.


4. I'm terrible at anything practical or geographical. I can bake you a cake, but please don't ask me to change a fuse or read a map for you.


5. I have a job which is very intense but gives me such a sense of fulfillment and joy. And no, I'm not going to tell you what that is either!


I'm passing the awards onto these great blogs:

1. The Cottage Smallholder


Now, onwards to my latest gluten free bake:

Gluten Free Thyme & Lemon Madeleines


Recipe
Adapted from the one given in Baked & Delicious Magazine, edition 9.
Serves 4/ Makes approx 16.

65g unsalted butter
65g caster sugar
65g gluten free plain flour (Dove's Farm or M&S recommended)
half a tbsp gluten free cornflour (M&S recommended)
2 eggs
1 teaspoon freshly squeezed lemon juice
quarter of a teaspoon almond extract
1 tablespoon thyme flowers or leaves, torn into little pieces, plus extra to decorate
icing sugar to sprinkle

1. Turn the oven to 190C (170C fan ovens).

2. Carefully melt the butter in a saucepan over a low heat, making sure it doesn't burn. Once all melted put the saucepan to one side to cool (and cover it with a plate if it's hot sunny weather like it is here).

3. Whisk the eggs, sugar, lemon juice and almond extract in a large bowl over a bain mairie, which is a pan of almost simmering water, until the mixture is foamy, thickened and tripled in size. You'll need to use an electric whisk unless you have incredibly strong wrists as this takes a lot of beating! Remove bowl from pan and continue beating the mixture until it has cooled.

4. Sift the flour with the cornflour. Then sift half on to the egg mixture. Fold it in with a metal spoon, lifting gently.

5. When combined, sift the rest of the flour on top and next add the melted butter, stirring gently until combined. Finally fold in the tablespoon of thyme.

6. Spoon the mixture into a 9 cake madeleine tray, smoothing the tops before placing in the oven for 10-12 minutes. Put the bowl with the remaining mixture in a cool place covered with a lid or plate and leave for a minute.

7. You'll know the madeleines are cooked when the tops are golden and springy to touch. Let them sit in the tray for 10 minutes before gently turning them out onto a plate or wire rack.


8. To bake the second batch, simply wipe the madeleine tray clean and repeat the process.


9. When all the madeleines are cool, place them on a couple of plates. Sprinkle with more thyme flowers before dusting with icing sugar. These little cakes taste great with a glass of cold white wine, or as an accompaniment with icecream.


These madeleines were idly baked while listening to the Red Hot Chilli Peppers album Californication


Sunday 20 May 2012

White Chocolate, Blueberry & Lemon Mascarpone Tart


Mr Eve likened this bake to how he likes his women: sweet, zesty, beautiful and tarty! I'm not complaining at the comparison, for this delicate, rich and summery tart is my most delicious yet. The flaky pastry compliments an unctuous mascarpone filling, whilst a zingy blueberry sauce cuts through the sweet creaminess of the white chocolate, enhancing and balancing the flavours.

This is one of those recipes that's best made the day before and brought out when you're ready to wow. Bear in mind that as it contains an unbaked filling, you'll need to keep the tart in the fridge before and after serving.


Recipe
Pastry recipe adapted from the one for Strawberry Tart by Alison Walker in the latest Country Living Magazine (June 2012), filling inspired by hers also. To buy the magazine and see more recipes, visit their website here: www.countryliving.co.uk  You can also buy the magazine at all good UK newsagents this month.


Serves 8-10

for the sweet shortcrust pastry:
225g plain flour
100g cold unsalted butter
2 tablespoons caster sugar
half a teaspoon of ground nutmeg
1 large egg, beaten


1. To make the pastry, quickly cut the cold butter into into small pieces. In a large bowl, combine the butter and flour, rubbing it in with your fingertips. Alternatively if you have a food processor then you can whizz them together briefly. Either way you want the mixture to be the consistency of fine breadcrumbs.

2. Mix in the sugar and nutmeg, before adding the egg, stirring gently until the mixture begins to cohere.

3. Place the pastry on a floured board, kneading it and adding a few drops of water if need be to encourage it to cling together.

4. Gather into a ball and wrap it with cling film then place in the fridge for 30 minutes.

5. After this time, roll the pastry out onto the floured board, rolling gently until it's the thickness of a 1 pound coin. Add a little more flour if the pastry starts sticking to the board. Get ready a deep 20cm tart tin with a removable base.

6. Carefully roll the pastry up over the rolling pin to help you place it onto the tart tin. Gently press the pastry into the base and sides of the tin and prick the base with a fork. Chill for 10 minutes in the fridge.


7. Turn the oven to 190C (170C fan ovens). Cover the base and sides of the pastry case with baking paper, and then fill the base with ceramic baking beans (or dried beans if easier). Bake in the oven for about 12 minutes until the pastry is set.

8. Remove the baking beans and paper, and bake for another 5-10 minutes until the pastry is sandy to touch. Then take out of the oven and leave to cool in the tin on a wire rack. When cool, remove the pastry case from the tin and place on a plate.


for the filling:
250g mascarpone cheese
100g white chocolate, broken into small pieces
2 tablespoons golden syrup
150ml double cream
finely grated zest of 1 lemon

9. To make the filling, gently melt the mascarpone, chocolate and syrup together in a bain mairie (a heatproof bowl over a pan of almost simmering water). Stir briefly when the mixture has melted, then take off the heat and put to one side to cool.

10. Whip the double cream lightly, until it has the same consistency as the mascarpone mixture.

11. Next fold in the lemon zest, and stir, followed by spoonfuls of the double cream. Fold in the rest of the double cream.

12. Carefully pour the filling into the cool pastry case, and place in the fridge to chill overnight.


for the blueberry sauce:
juice of 1 large lemon or 2 small ones
200g blueberries, washed and dried
2 tablespoons golden syrup


13. For the blueberry sauce, heat the lemon juice, syrup and 100g of the blueberries in a pan. Bring to the boil, then simmer for 3-4 mins, stirring occasionally. Taste the sauce, and add a dash more lemon juice if needed.

14. Next you can either use a liquidiser, or do what I did and mash the warmed mixture with a potato masher so that the blueberries have burst all their juices. Stir again, then pass the mixture through a fine sieve with a bowl underneath to catch the sauce. Put the sauce to one side to cool briefly.

15. Finally, take the tart out of the fridge and decorate it with blueberry sauce, plus the remaining blueberries. Serve immediately, with more sauce on the side.


This tart was idly baked while listening to Nick Drake's album Bryter Layter


Sunday 13 May 2012

Lavender & Lime Cake


This cake owes much to our blossoming herb garden. Pretty and simple, it combines the delicate taste of our beautiful fresh home grown lavender with a dash of lime to cut through the sweetness in the glace icing. We ate it today accompanied by warm cups of tea infused with home grown lemon balm.


Recipe
My own recipe

for the base:
200g butter, room temperature
200g caster sugar
3 eggs, room temperature
half a teaspoon vanilla extract
1 tablespoon freshly squeezed lime juice
200g plain flour
1 teaspoon baking powder
75 ml half fat creme fraiche
1 and a half tablespoons grated lime zest
2 or 3 tablespoons chopped fresh lavender florets (or half a tablespoon only of dried lavender)


1. Turn the oven to 170C (150C fan oven). Grease and line a round 20cm baking tin. I used a decorative one from Lakeland, which is still for sale on their website. If like me you use a decorative one then it will need just greasing not lining.

2. In a large mixing bowl, beat the butter and sugar together for at least 3 minutes, until pale and fluffy.

3. Add the first beaten egg, vanilla extract and lime juice to the creamed mixture, then sieve in a little of the flour and stir gently before adding the other 2 eggs, and beating well.


4. Stir in the lavender and lime zest before gently folding in the rest of the flour.

5. Spoon in the creme fraiche, and give the batter a final gentle stir until it is well combined.

6. Pour the batter into the prepared baking tin and bake for approx 50mins, until the top bounces back under your thumb and a skewer inserted comes out clean.

7. Leave in the tin for 10 minutes before taking out to place on a wire rack or plate to cool completely.


for the icing:
250g icing sugar
1 tablespoons freshly squeezed lime juice
1 or 2 tablespoons water
4 fresh lavender florets, chopped, optional (or a small amount of dried lavender)


8. Sift the icing sugar into a mixing bowl. Add a tablespoon at a time of the lime juice, whisking with a fork until the icing is glossy and runny, but thick enough to cover the back of a spoon.


9. Ice the top and sides of the cake. Scatter the lavender florets over the cake while the icing is still wet, then leave the icing to set for at least half an hour in a cool place.


10. Serve for tea with a good cuppa.


This cake was idly baked while listening to the Tonight programme on BBC Radio 4


Saturday 5 May 2012

Gluten Free, Nut Free: Cardamon Pear Cake


This dessert cake is moist and delicate, the crumb threaded with rum soaked pears and a hint of cardamon spice. A great gluten and nut free bake which tastes gorgeous whether served warm or cold.


Recipe
My own, inspired by one for Anjou Pear Cake at bbcgoodfood.com see the recipe here.

Serves 8-10


for the pears:
500g pears, ideally firm not overripe
freshly squeezed juice of 1 lemon
1 tablespoon rum

for the base:
175g unsalted butter, room temperature
175g light muscovado sugar
3 large or medium eggs
175g gluten free self raising flour (Dove's Farm recommended)
1 teaspoon gluten free baking powder (Barkart recommended)
1 teaspoon ground cardamon seeds, taken from 3 pods


1. Heat oven to 180 (160C Fan) and line and grease a 20cm spring form cake tin.

2. Peel, core and chop the pears into small pieces, then soak them in a bowl with the rum and lemon juice to stop them browning.

3. Cream the butter and sugar together in a large bowl until pale and fluffy.

4. Add the first egg, and a tablespoon of flour, and then beat well.

5. Follow the same process for the other 2 eggs, beating each with a tablespoon of flour into the batter until frothy.

6. To prepare the cardamon, open 3 pods and grind the seeds in a pestle and mortar before stirring into the cake batter.

7. Sift in the rest of the gluten free flour and the baking powder, and stir until well combined.

8. Gently fold in the pear pieces, with a teaspoon or so of the rum and lemon juice.

9. Spoon the batter into the prepared cake tin, and smooth down the top. Bake in the oven for about 45 minutes, until a skewer comes out clean.


10. When the cake is done, take it out of the oven and leave to cool for 15 minutes in the tin, before carefully placing upside down on a wire rack or plate to cool further.

11. When ready to serve, place a paper doily over the top of the cake and sift icing sugar to create a little sugar stencil pattern.

12. You can serve this cake warm or cooled, and decorated with the icing sugar stencil, or simply with sifted icing sugar ontop. Serve with creme fraiche or cream, perhaps even with a drizzle more rum if you're feeling especially naughty as our friends were today!


This cake was idly baked while listening to the Lianne La Havas album Lost & Found